

Part one and part two of the series discuss how to see more creatively by using the elements and principles of design. In part three professional prop stylist Paula Walters shares her tips on how to choose the right props for your images. For part four, food stylist Tami Hardeman answers your questions on food styling. In part five of the series, food and still life photographer Ilva Beretta talks about creating moods in food photography.
Today food blogger and food photographer Meeta K. Wolff is here to wrap up the concepts we have explored with some practical advice on where to start when styling and propping your food photos.
A freelance food photographer, stylist and writer, Meeta currently lives in Weimar, Germany with her husband and son. Her blog What’s for Lunch, Honey? is where you’ll find her sharing her favorite fresh, organic and multi-cultural dishes. You can find her professional work at Meeta K. Wolff Photography. You can also connect with her on Facebook, Google+, and Twitter. Welcome Meeta!
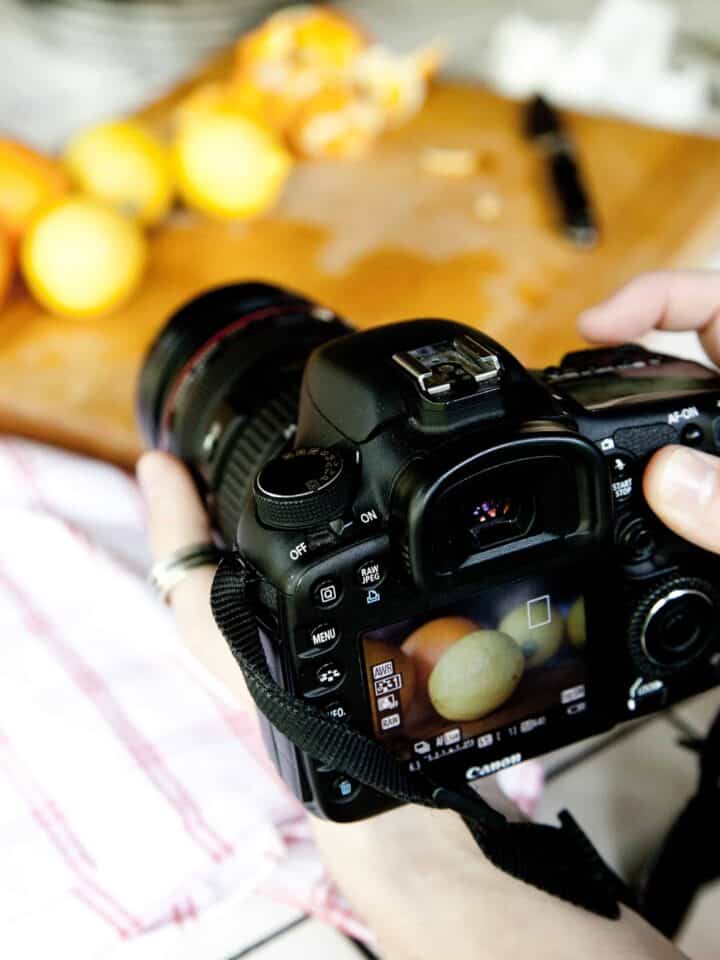
The first step to creating a really excellent food photo is neither the styling nor the fancy props. First and foremost is learning how to use your camera and how to harness the light and lighting situations to capture the perfect image.

Capturing a really good food image is a process of many elements and each needs equal care and attention. When I talk at conferences and at our Plate to Page workshops , one of the things we discuss are the 6 basic aspects, as I see it, of food photography:
1. Camera
2. Light and Lighting
3. Color
4. Texture
5. Focus
6. Styling and Props
Each one aspect is as important to master as the next, but it is the process of learning each element and how they complement each other that will give you a better creative control over your images. Once you know how to make each aspect work for you it will be a lot easier to find your own style. And that is what you are aiming for – your style and your creativity – not someone else’s.

Before you go diving into overly styled or overly propped images make sure you know everything you need to about each individual element, like lighting for example. Lighting has the biggest visible impact on your images and, fact is, if your lighting is bad so will be your photograph and no fancy styling will help improve that.
Styling and selecting the right props for your images is definitely not rocket science, they are creative elements and it is just an art one needs to develop. Just like painting (or any other activity), one needs to experiment and practice before the masterpiece can be painted. Eventually you will train your eye to find the right style and select the appropriate props that evoke the required mood or atmosphere for the shot.
Once you know the fundamental elements of styling it is easy to take the next step and build up on the basics. This article is addressed to the food bloggers and food photographers who stand at the beginning of the road to styling and propping.
Usually your budget will not allow you to equip yourself with a complete prop closet (is there even such a thing as a complete prop closet?), which contains everything a professional prop stylist might have access to. I have to warn you though that this aspect of food photography can become addictive and costly along the road. However, with a few clever tricks and essentials you will be able to take first affordable steps towards styling your scene.
So, when does one start thinking about styling and selecting the right props for a shot? Believe it or not I usually begin at the market or the grocery store.

When selecting the ingredients I begin thinking about the dish they will go in. I absorb the color, texture and begin thinking about the props and backgrounds that will highlight them.
Then, while going through the recipe I begin to make the first decisions as to the props I can use. Natural props are a great and easy way to add subtle highlights to your shot. Everything from herbs, spices, fruit, nuts, vegetables, sugar, peppercorns and more, can be used while you compose your scene.
Make a note of the ingredients that go into the dish and save the best looking ones as your natural props. You might eventually decide not to use them in your final composition, but it is useful to have them just in case you do.
While preparing your dish allow your thoughts to explore the atmosphere you want to create, the mood you want to evoke and the story you want to tell.

Ask yourself questions like:
- Is this dish/cake/recipe summery, rustic, autumny … etc.?
- What event am I making this for – birthday, Valentine’s, picnic … etc.?
- What memories do I have attached with this dish/recipe?
Nine out of ten times this process will give you further direction to finding the right composition and style for the shot.
Now that you have your first natural props set aside and you have an idea about the atmosphere and mood you want to create, you can think about the props that will help you to set the scene.
It’s always important to remember that food is your real star and the props you use are there to help you enhance the scene and the appearance of the photograph.
Keep your styling simple and clean instead of overdoing it with extravagant props. Start with just a couple of pieces and evaluate the set-up. Then, build it up from here by adding more – but only if required.
- Use simple colored plates/bowls: whites and pastels work best and highlight the food more.

- Use colorful napkins, accessories, fabric and backgrounds to place a splash of color where required.

- Think about the atmosphere and mood you are aiming to create. Go with deep warm browns and earthy tones for an intense, rich or dramatic look or use pretty pastels for a delicate, feminine or fun look.

For those who are just starting to discover prop styling, having a few basic prop pieces that you can mix and match with each other is quite adequate. If you are on a budget you cannot invest on several items at once but the few basic props will take you a long way.
Basic props to start with:
- Simple plates, bowls, cups and glasses, preferably in light colors. I personally find whites and pastel colors in a very basic design great. They look elegant and clean, allowing me to pair them with bolder colored accessories like napkins.

- A few simple pieces of flatware and a couple of vintage silverware. Remember you are not looking for entire sets of 6 or 8 but just one piece of each and maybe a few cake forks and teaspoons.

- Napkins, fabric, kitchen towels or paper napkins are fun accessories that enliven and break up the image. I usually head out to my fabric store or Ikea and get a meter or two of colorful and patterned fabric that work well as napkins and as backgrounds

This would be the very basic you need to get yourself going. I won’t lie, collecting props will not stop here and eventually you will collect other items along the way. However, with a few of these basic and timeless items you won’t go wrong and they work really well with complementary accessories allowing you quite a bit of versatility.
I’ve always said “Life is like a box of props, you never know what you might find!” With that in mind, I look at the world around me like a big box of props. Think out of the box and be creative when looking for unique and original items you can use as props or backgrounds.
I have no reservations about rummaging through neighbors’ bulk trash. I’ve found some fantastic old pieces that work well for many purposes. The door to an old kitchen cupboard for example, naturally distressed over time, makes a great background, as do old retro pieces of wall paper, kitchen or bathroom tiles, wrapping paper, old wooden crates …. you see the possibilities are endless.
Do not stop at things you can only find at a store, go beyond and look at the world around you as if it was your own personal prop box.

It’s important to analyze color and texture of not only the food but of the entire set-up. Color and texture are two important aspects of photography as both play vital roles on a few levels.
For example, the texture of the ingredients you use and the way you set them up will have an effect on the way the light hits, reflects and bounces off each item. In the same way, light will play the same game with the props you use. Glossy and shiny plates or backgrounds will create more of a glare in comparison to matte colored pieces that provide a more subdued look.

Use color thoughtfully and in moderation. Too many color themes will overkill the image, making the photograph look cheesy and taking away the attention from the main motive – the food. And it will often be the color and tones of the food that will guide you to select a color scheme for your photograph.
Start by analyzing the color and color combinations of your food, then select the background, pick out the bowls/plates and napkins accordingly. There is a lot of potential and room for creativity as you can play around with complementary colors or keep the colors tone in tone, using different shades of the same color, or use analogous colors.

To assist me with my color schemes I sometimes turn to the Color Scheme Designer, which is actually used for web designs but I find it works beautifully for coloring my set-up.
Look at your set-up through the camera viewer. Use your background like you would a canvas and start painting.
The most important advice I can give, however, is while you are experimenting and trying to find the right look for your food images, make sure you stay true to your style and have fun discovering your own versatility. It’s not important to create perfectly styled images right from the beginning. What is more important is taking the time to learn the techniques and finding out what works for you.
My blog best documents my journey through food photography and styling. If you browse through some of my very old posts you will see how I progressed from month to month. I keep these pictures up because I am proud of where the road has taken me over the years. I have learned valuable lessons and have developed my own distinct style. This style now allows me to work more professionally in the field of food photography and styling.

I very strongly believe that copying the styles of popular food bloggers or photographers is definitely not the route to discover your own strengths and weaknesses. Something very vital gets lost along the way to copying – you lose your imagination, creativity and maybe even the passion that drives us. If you do take the jump into professional work you will need all this and also need the flexibility and the techniques to create many different scenes, moods and atmospheres for the magazines or ad agencies you work for.
In our Plate to Page workshops we delve into these and many more aspects of photography a lot deeper and each participant is given enough room and time to research, find and enhance their style. Over a span of an entire weekend we spend a lot of time not only discussing, but with hands on exercises we encourage and guide them to think creatively, out of the box and inspire them with fresh ideas.
Thank you Meeta for wrapping up the series with these wonderful tips on where to start when styling your food photos. For more beautiful food photography and recipes please visit Meeta’s food blog: What’s for Lunch, Honey?
(Writing and photography submitted for this post by Meeta K. Wolff, all rights reserved 2011.)
Read Part 1 of The Language of Food Photography | Learning the Visual Elements of Design.
Read Part 2 of the Language of Food Photography | The Principles of Design.
Read Part 3 of the Language of Food Photography | Prop Styling with Paula Walters.
Read Part 4 of the Language of Food Photography | Food Styling with Tami Hardeman.
Read Part 5 of the Language of Food Photography | Creating Moods with Ilva Beretta.
I hope you've enjoyed The Language of Food Photography Series. I'd love to hear your feedback below.

Sylvie Shirazi is the recipe developer and food photographer behind Gourmande in the Kitchen. For the last 10 years she's been making eating more healthfully easy and accessible with gluten-free, grain-free, paleo and vegan recipes that are free from processed ingredients.
Emily says
These articles were so GREAT! I ran to the thrift store today and scored some gorgeous props! So grateful for this series. Thank you!
Jamie says
Simply elegant and beautiful!!! So much great advice. Loved this. I will also buy scrapbook paper on sale at the craft store to get a backdrop. Will go and visit fabric store to see what is available! Thank you!!
Alissa @ Not Just Apples says
Incredible series! Loved it, and it was so useful to be able to print out too, so I can refer back to it, and keep learning. Thanks so much!
Cristina from TeenieCakes says
I luv Meeta's work and was first introduced to her talents when I was part of the Daring Bakers years ago. Great post and insights with breathtaking images.
I've missed some of the past posts in this fantastic series you're sharing, Sylvie. I'm looking forward to reading the rest and am enjoying the subject matter and the featured guests you've invited. Thank you for sharing this inspirational series.
Deborah says
I have loved this whole series!! Meeta's blog was the very first blog I started reading many, many years ago, and it was great to read this from her!